Showing posts with label tutorial. Show all posts

Thursday, November 10, 2011

tutorial - zippered handphone pouch


1. Cut out -  6" x 6 3/4" of fabric for the exterior - 1 piece
6" x 6 3/4" of fabric for the lining - 1 piece
2.5" x 12.5" of fabric for the strap - 1 piece
8 inch zipper

2. Add interfacing on the exterior , lining and strap fabric
3. Fold the fabric to make the strap to the middle crease and press
4. Fold again into half
5. Sew on both side to close it
6. Mark with a pen the middle point of the longest length for the exterior fabric


7. Place the strap that's been folded into half right in the middle where the mark is
8. Sew it in place
9. Place the zipper on the lining piece right in the middle of the longest length of the fabric
10. Lay the exterior fabric with strap sewn, on top of the zipper with right side of both fabrics facing together
11. Make sure that the zipper is unzipped
12. Start sewing from the middle and stop about an inch before the end of the fabric


13. Snip the zipper, cut the end of both fabric to make it into curve
14. Place the exterior fabric on top of the zipper again and continue sewing the curve right to the end of the fabric
15. This is how it looks like inside
16. Exterior view with one side of the zipper sewn
17. Repeat the same step for the other side with the zipper unzipped


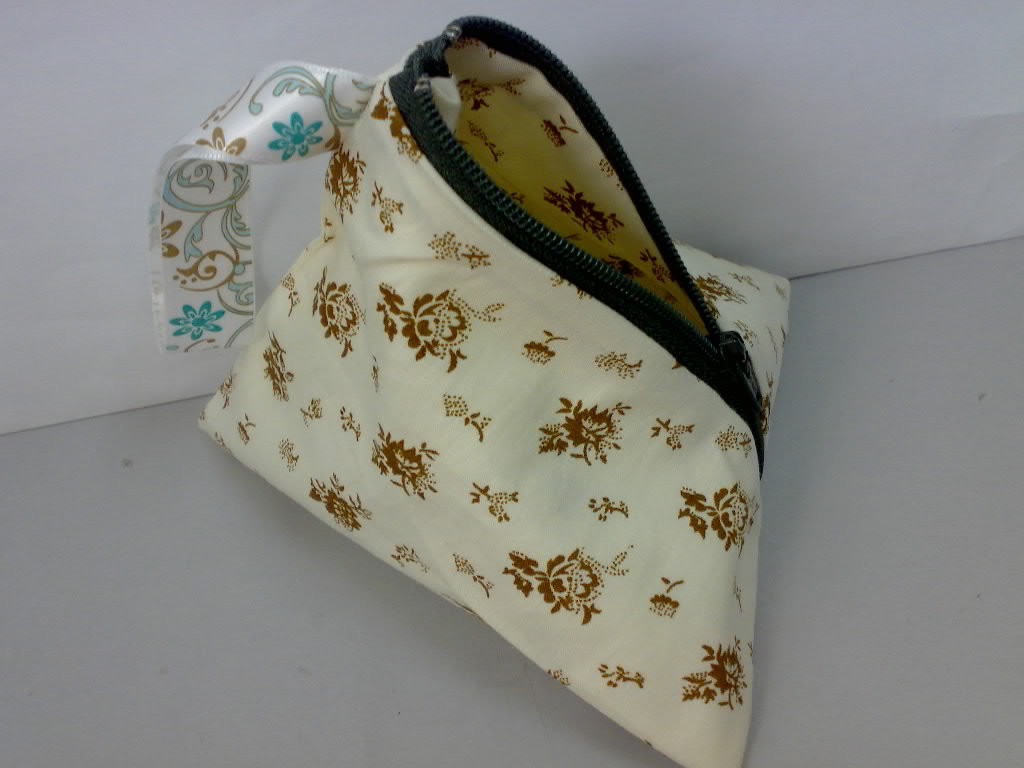
19. Here's how it looks like when both side has been sewn
20. View from the side (inside view with zipper open - it's important to leave the zipper open as we are going to turn it out later
21. Now put the exterior pieces together as well as the lining pieces and pin in place
22. Sew across it and leave at lease 1 inch for the opening (marked line in blue)
23. Through the opening , turn the whole thing inside out
24. Stitch the opening close by hand (slip stitch) or machine (like me!)


That's it! It's done and ready for some show off :)
Alternative for the strap by using ribbon.
Good luck and Happy Sewing!

Friday, February 25, 2011

tutorial : buttercup bag with zipper closure


here's an easy way to sew zippers for the buttercup bag from made by rae pattern. this tutorial is for those of you who has sewn the buttercup bag before as its mainly only pictures and very few instructions (im so lazy to write a tutorial) so that it will be much easier to understand :)
 

first you will need to prepare the zipper. sew both ends with a small piece of rectangle fabric. cut 2 larger rectangle fabric and fold it into half and sew on top of the zipper.


next place that piece of sewn zipper gusset on top of the RIGHT side of the lining pieces and pin in place. sew the same process on the other side of the lining.


you will have something that looks like this :) i hope everything goes on well at this stage. hehe


fold the lining RIGHT sides together with the zipper gusset folded inside like in the picture above and pin in place. sew all around the lining.


now for the last bit, insert the lining piece into the outer fabric piece (that you have already sewn together and attach the strap) and fold in both lining and outer piece. topstitch it close all around the edge. this is a little bit tricky as the top of it will tend to be very thick (lining + interfacing+ outer fabric + interfacing + etc hehe). just go slow and everything will be done nicely :) . for this bag i slip stitch by hand :P

Sunday, October 3, 2010

tutorial : fun fabric flower

this is the tutorial for fun fabric flower.


first cut 6 pieces of  fabrics 6"diameter and 1 piece of  fabric 4" diameter.


once you have all the pieces , fold the bigger pieces (which will become the flower petals) into half and then half again like in the picture below.


you will be having all 6 pieces folded into quarters.


next sew at the end of it with running stitches and connect all six pieces together. you could do it by hand or machine but i prefer sewing it by hand as i can adjust the distance between the stitches.


as for the smaller pieces (which will become the center of the flower) i stuffed it with rags from fabric or you could stuff it with cotton fiber and stitch it closed.


thats it, very easy and simple ! if you have any questions , drop me a line :)
enjoy your new fabric flower!

Wednesday, August 25, 2010

tutorial : pyramid pouch


here's the tutorial for pyramid pouch that i made recently. i've mentioned in my previous post that i'll post the tutorial so grab your pen/pencil and paper or just print this tutorial out :)

first gather all the stuff you need to make one :-
- cut 1 outer fabric 10 1/4" (26cm) x  6" (15cm) - interfacing is optional
- cut 1 fabric for lining 10 1/4" (26cm) x 6" (15cm) - interfacing is optional
- 1 zipper 6"
- 1 strip of ribbon 8"


the instructions are pretty simple. i guess the pictures tell a thousand words.
*just to notify that ive used the same fabric design for outer part and lining of the pouch. and i dont use interfacing. (interfacing will make it more stabilized and structured tough!).

first place the zipper facing up on one of the shorter ends of the right side of fabric (lining). next place another fabric (outer) right side facing the first fabric on top of it and sew it in place. (pictures above)


now basically you're done for one side of the zipper. as for the other side of the zipper again place the zipper on the right side of fabric and place the other fabric on top of the zipper (like in the pictures above). its kinda like 'sandwiched' the zipper in between.


sew it and now you're done with zippers! next open it up and adjust it so that the end of the zipper is place in the middle of the fabric pieces. i cut a slit on both fabric to mark its center. then sew it right through. (pictures below as references).


as for the other end of the fabric, line up the zippers so that they match and pin in place. next place your ribbon on the outer part of the fabric facing in and pin in place again. very important note : make sure your zippers are open at this point!


sew it all the way across the zipper and leave about 2" opening to turn it over (2" opening marked with a blue line). once you're done with it , turn it over through the opening you left and stitched it close.


well thats it! enjoy your new pouch and happy sewing :)

Sunday, June 6, 2010

tutorial : fabric bows


this is the tutorial for making fabric bows. first you will need to cut 6 fabrics of 3 different fabric design and the measurements are :
fabric 1 - 7.5" x  8.5" (cut 2 pieces)
fabric 2 - 8.5" x 9.5" (cut 2 pieces)
fabric 3 - 9.5" x 10.5" (cut 2 pieces)
(you can either use ribbon in the middle or cut 2 pieces of small pieces of fabric size 2" x 5")


sew the middle pieces together, right sides facing and turn it inside out. sew all around the first , second and third fabric right sides facing and leaving a few inches wide open at the end for turning.


snip the corners to make turning easier and nicer. turn it out and use a closed scissors or pen to push the remaining fabric out. do this on all 3 fabric pieces. then sew slip stitch to close the opening. press with an iron to smooth out creases.


now place fabric 1 on top of fabric 2 and fabric 3 being at the bottom. fold all 3 fabrics into half and start folding the fabric concertina fold and hold it with a pin.


once you've done that, fold the middle fabric piece into half and fold again the sides to the middle creases and place it in the middle of the bow. stitch it in place. you can attach pins if you like.

now its ready to be used as an embellishment for your handmade stuff. happy sewing :)